Sunday, January 9, 2011

Forefront TMG 2010 Administrator’s Companion available for pre-order

Greetings. We authors of Forefront TMG 2010 Administrator’s Companion are about to finish work on the book, which will be available in January 2010.

To begin giving you a sense of the book, today we’d like to share its Introduction.

Pre-order is available at DigitalGuru; make sure to reserve yours!

Introduction

Forefront Threat Management Gateway Administrator’s Companion is intended to be a functionally usable resource for Forefront TMG 2010 administrators. This admin’s companion is a reference that you’ll want to keep near to hand. The book covers everything you need to learn about and to perform the administrative tasks for Forefront TMG 2010. This book is focused on giving you as much information as possible in a well-organized, clearly written manner.

In short, this book is designed to be the one and only Forefront TMG resource you turn to. To this end, the book zeroes in on common administrative scenarios, frequently performed tasks with documented examples and as many troubleshooting tips as we could fit. One of the goals was to keep the content reasonably concise that the book remains compact and easy to navigate while at the same time ensuring that the book includes as much information as possible—making it a valuable resource. Thus, instead of a lightweight 100-page quick reference, you get a valuable resource guide that can help you quickly and easily perform common tasks, solve problems, and implement advanced Forefront TMG 2010 technologies such as Exchange 2010 publishing, site-to-site VPN management as well as URL Filtering and ISP Redundancy management.

Who Is This Book For?

Forefront Threat Management Gateway Administrator’s Companion covers the Standard and Enterprise editions of Forefront TMG 2010. The book is designed for the following readers:

  • Current Forefront TMG 2010 administrators
  • Current ISA Server 2004 administrators who want to learn Forefront TMG 2010
  • Administrators upgrading to Forefront TMG 2010 from Forefront TMG Medium Business Edition
  • Administrators upgrading to Forefront TMG 2010 from ISA Server 2006
  • Administrators upgrading to Forefront TMG 2010 from ISA Server 2004
  • Managers and supervisors who have been delegated authority to manage Forefront TMG 2010

In order to make the book as understandable as possible, we included some information about basic networking concepts such as IP routing and a discussion of the HTTP protocol and authentication. For those who already possess this knowledge, we’ve placed the bulk of this information in appendices at the end of the book to reduce in-chapter clutter.

We also assume that you are fairly familiar with Windows Server 2008. If you need help learning Windows Server, we recommend that you buy Windows Server 2008 Administrator’s Pocket Consultant or Windows Server 2008 Inside Out.

How Is This Book Organized?

Forefront Threat Management Gateway Administrator’s Companion is designed to provide education about TMG deployment scenarios as much as the features Forefront TMG brings to your firewall deployments. If you are reading this book, you should be aware of the relationship between Pocket Consultants and Administrator’s Companions. Both types of books are designed to be part of an administrator’s library. Pocket Consultants are the down-and-dirty, in-the-trenches books, while Administrator’s Companions are the comprehensive tutorials and references that cover every aspect of deploying a product or technology in the enterprise.

The first two chapters provide an overview of the new edge security products features offered in the Forefront product suite. Chapter 1 discusses the differences between Forefront TMG Medium Business Edition and Forefront TMG 2010. Chapter 2 compares Forefront TMG with Forefront UAG and helps you decide which is more appropriate to your organization’s needs.

In chapters 3 through 7, we cover the various processes involved with evaluating your organization’s requirements and planning your Forefront TMG deployment to support them. These include such factors as determining your traffic profile, mapping your network structure and the Forefront TMG role in that structure; whether it is for edge protection or network isolation. We also outline the upgrade and migration options and considerations for that task.

In chapters 8 through 10, we guide you through actual Forefront TMG installation, installation troubleshooting and provide an introduction to the management console. In chapters 11through 14, we cover basic firewall access policies, network concepts, NIS and various load-balancing methodologies. Chapters 15 and 16 concentrate on the Web proxy and caching concepts.

Chapters 17 through 20 discuss the various forms of traffic protection afforded clients in protected networks, including how these mechanisms interact as well as how to configure, evaluate and troubleshoot them. Chapters 21 through 24 describe various publishing scenarios such as Exchange Web mail, SharePoint and server publishing, outlining the differences and commonalities between them. Each of these chapters offers troubleshooting hints directly related to those scenarios. Chapters 25 through 27 cover VPN concepts and scenarios.

Chapter 28 discusses Forefront TMG logging, including how to use the live and historical log query mechanisms. Chapter 29 covers enhanced NAT; a new feature that allows you to define 1:1 relationships between protected network entities and an IP address in the destination network. Chapter 30 covers Forefront TMG Component Object Model and provides an example of how to automate a common administrative task using VBScript, Jscript and PowerShell.

Chapters 31 through 33 are dedicated to troubleshooting techniques, methodology and tools, with chapter 33 dedicated to using Network Monitor 3. Appendices A through D provide the down-and-dirty discussions around HTTP, authentication, performance monitoring, windows Internet library behaviors as web proxy clients and a detailed dissection of the WPAD script.

8 Reasons NOT to Use Microsoft Forefront TMG’s Reporting

I’ve been having a look through the reporting functionality included in Microsoft Forefront Threat Management Gateway to find that not much has changed from ISA Server 2006. There is some new information regarding the newly implemented URL categorization and threat management technology, but there is very little flexibility or customization for those with reporting requirements beyond general overviews cluttered with irrelevant information.

Here’s a quick video outlining some of the differences between TMGs Reporting, and what can be achieved using WebSpy Vantage. The video does not illustrate all the limitations outlined below, so please read on.

Whats is in the Forefront TMG report?

The default TMG report contains the following sections

  • Summary
  • Web Usage
  • Application Usage
  • Traffic and Utilization
  • Security
  • Malware Protection
  • URL Filtering
  • Network Inspection System

Each section contains overviews such as ‘Top users’ and ‘Top Sites’.

If your reporting requirements can be satisfied with these overviews – that’s great! Unfortunately, when you start thinking about what system administrators and other people in your organization actually need to make informed decisions, this report is quite limiting.

The 8 Limitations of Microsoft Forefront TMG’s Reporting

Here is what I consider to be the 8 main limitations of Microsoft Forefront TMG’s reporting functionality.

1. No Drilldowns

Want to see the sites that the top 5 users accessed? Want to see the users that downloaded the most traffic from youtube? These are fairly standard reporting requirements that simply cannot be achieved using the inbuilt TMG reporting.

WebSpy Vantage lets you either interactively drilldown into a user or site, or produce a regular report that includes further details about what your top users have actually been up to.

2. No Filtering

When you generate a report in TMG, you can only filter the report by a date range. There is no way to filter out anonymous (unauthenticated) traffic or exclude traffic coming from advertising servers (such as doubleclick and 2mdn.net) that tend to dominate most of the top 10 sites.

This can easily be achieved using WebSpy’s software. Check out my video on how to remove clutter from your web reports.

3. No Customization

Customization of each overview in the TMG report is limited to the number of items to show (e.g. top 5 or top 50 users), and the sort order (Incoming Bytes, Outgoing Bytes, Requests and Total Bytes).

What about the time a user spent browsing the web, or the number of users that visited a specific site? There is no way to add custom columns such as total browsing time, average session time, or number of users/sites/IPs to the report tables.

Or say you simply want to change your top users chart from a bar to pie to easily see the percentage used. Nope sorry!

If you do make one of the two available customizations in a TMG report, you then get the annoying Apply / Discard message to save changes to the configuration database.

All of these customizations can be achieved using WebSpy Vantage, and it doesn’t touch your TMG server to apply a change to a report.

4. Limited Report Distribution

When you generate a report, you get the option to email it to a specific email address. What if you would like to create a report for every department, and then email it to the managers of each department? Or better yet, host the report on a secure web server where department managers can log in and view their reports?

WebSpy Vantage Ultimate comes with a secure ‘Web Module’ specifically for this purpose and managers still receive a link to the report via email.

5. Cluttered ‘Top Sites’ List

The ‘Top sites’ list can become particularly cluttered due to the inclusion of sub-domains. I don’t want to mentally add up the size values from farm1.static.flickr.com, farm2.static.flickr.com, and farm3.static.flicr.com – I just want to know how much was downloaded from flickr.com.

This is compounded by the inability to exclude sites that are merely placing advertising banners on the actual sites users are visiting (as mentioned in the ‘No Filtering’ limitation above).

WebSpy Vantage breaks URLs down into separate components and lets you analyze each part separately. Look at the Site Domains summary to remove sub-domains and see only flickr.com. Or perhaps you want to see the keywords a user entered into search engines like Google? Or perhaps the top pages accessed within a website? No problem. Just include the Site Keywordsor Site Resource summaries in your Vantage reports.

6. No Grouping or Aliasing

There is no way to group users into departments or locations, or IP addresses into subnets, or extensions such as .html, .pdf or .exe into file types. The ability to group and represent raw log data in more meaningful ways, as offered by WebSpy Vantage, can increase the value of a report tremendously.

7. No Productivity Assessment

One of the major features introduced in TMG since ISA Server 2006 is the included URL categorization technology.

Although the TMG report gives you an overview of the categories that have been visited, the report does not use this information to display a productivity assessment for your users.

WebSpy Vantage not only provides this assessment, but also the ability to customize the categories that are deemed productive as this can vary wildly depending on the industry and organization.

8. Not browser independent

This is a minor limitation that can be a major annoyance. The report that TMG produces is a HTML report that only displays correctly in Internet Explorer. As Forefront TMG is a Microsoft product, this is not exactly surprising, but still very annoying if IE is not your default browser.

How to get awesome reports from Forefront TMG

If you have had personal experience with any of the above limitations, you’ve probably been hunting for an alternative solution. I strongly recommend checking out the WebSpy Vantagerange of products, and if you would like secure report distribution via the ‘Web Module’, Vantage Ultimate is what you are after.

Publishing Remote Desktop Service with Forefront TMG 2010

When you have successfully deployed RDS in your network up and running, here is how to publish it via Forefront TMG 2010 to your external and mobile users.

Note: We suspect you used SAN certificates during your RDS deployment, which contain at least the internal and external FQDN of your RDS environment. And you have a single certificate for your RD Session Host, as RDP connection security still not support SAN certificates.

Now we are going to start with the Publishing Rule for your RD WebAccess and RD Gateway Server.

Import your SAN certificate into the local certificate store of your TMG.

Create a simple Web Listener for HTTPS with your imported certificate and select no client authentication.

Now use the Exchange Web Client Access Publishing Wizard and create a publishing rule just if you would create or already have created for OWA publishing, but choose your HTTPS Web Listener which you created before when requested. On the Authentication Delegation step select ‘no delegation, but client may authenticate directly’ and leave it with ‘All users’ on the next wizard page and finalize.

Note: If you have separated your RDS environment so that the RD Gateway and RD WebAccess are on different server, you need to create two of this publishing rules, one for RDG and another for RD WebAccess. If you use Split-DNS you can go with one rule when you enable forwarding the original host header in your rule.

After you‘ve created what you need, go into each of this publishing rules and check the ‘Public Name’ and the ‘Path’ tabs and make sure, you have only /rdweb/* for your RD WebAccess Publishing Rule and /rpc/* for your RD Gateway Publishing Rule, or all in one rule if you have all on one server.

So now from the TMG site we are done. Easy isn’t it? :-)

Now take care your RD environment is configured well for internet publishing. Perhaps check the documentations on TechNet where you find all what needs to be prepared. Look very carefully into RD WebAccess and RD Session Host RDP Connection configuration regarding the certificates and don’t forget to to add your RD Gateway settings with RemoteApp Manager on your RD Session Host.

And now you are done and your published apps are available for external users. Keep in mind, if you used your own CA, that the clients must have the Root CA certificate to trust the certificates which have been issued for your RDS environment. And of course, your clients needs latest RDP protocol version with RDP client 6.1 or higher installed.

When you use Windows 7 and/or Windows 2008 as a client, you have to publish your CA if you used an own one. Because this new OS have a more restricted security, they want to check the CRL (Certificate Revocation List) if the certificate is still valid. Older OS don’t do this.

Before you can publish your CA via TMG you need to add the path how to access your CertEnroll virtual directory on your CA. Open the CA MMC and open the properties. On the Extensions tab, confirm that Select extension is set to CRL Distribution Point (CDP) and add the HTTP URL for your CA. Make sure the /CertEnroll virtual directory of your Root CA is enabled to accept anonymous read access.

If you have still problems with the certificate, even you published your CA’s CRL, try following registry key on your Windows Vista or Windows 7 client to solve the issue:

Add DWORD key in the registry: UseCachedCRLOnlyAndIgnoreRevocationUnknownErrors

Under the location:  HKLM\\System\\CurrentControlSet\\Control\\LSA\\CredSSP

Value: 1

The following informations for ISA should work for TMG also:

Publishing Remote Desktop Web Connection Sites with the ISA Firewall Part 1 – Remote Desktop Web Services Concepts

http://www.isaserver.org/tutorials/Publishing-Remote-Desktop-Web-Connection-Sites-ISA-Firewall-Part1.html

Publishing Remote Desktop Web Connection Sites with the ISA Firewall Part 2: Creating the Web and Server Publishing Rules

http://www.isaserver.org/tutorials/Publishing-Remote-Desktop-Web-Connection-Sites-ISA-Firewall-Part2.html

Publishing Remote Desktop Web Connection Sites with the ISA Firewall Part 3: Testing and Troubleshooting

http://www.isaserver.org/tutorials/Publishing-Remote-Desktop-Web-Connection-Sites-ISA-Firewall-Part3.html

Forefront TMG on Windows Server 2008 Core R2

To continue the unsupported series I decided to try to install Forefront TMG on Windows Server 2008 R2 over the holidays after a discussion with Kent Nordström from XP Services and Martin Lidholm from Lidholm&Co. This proved to be an impossible mission though since prerequisites are impossible to install on a Core-installation.

Failures

First failure: Installing SQL Server 2008 Express Edition.
Did this manually, came a little further.

Second failure: Prerequisite check doesn’t work due to usage of legacy technology on the TMG part.
Error message:
15:36:57 ISA setup CA INFO : Running command line: C:\Windows\system32\servermanagercmd.exe -inputpath “D:\FPC\\PreRequisiteInstallerFiles\WinRolesInstallSA_Win7.xml”…

Well, servermanagercmd isn’t around anymore and is replaced with PowerShell. So even if all the roles were to be installed, it’d still fail. Probably possible to copy servermanagercmd.exe from a 2008 Core just to fool the installer.

Prerequisites

The prerequisites for TMG states that the following roles/features need to be installed:

Network Policy Server (not possible on Core)
Routing and Remote Access Services (not possible on Core)
Active Directory Lightweight Directory Services Tools
Network Load Balancing Tools
Windows PowerShell
Microsoft .NET 3.5 Framework SP1
Microsoft Windows Installer 4.5
Windows Update
Windows Web Services API

Conclusion:

Server Core would be a perfect platform for TMG considering the attack surface, less services, less patching and so on. The management of TMG / Server Core is done remotely anyway so the lack of a GUI wouldn’t be negative either. I’d like to see a special build from Microsoft where the prereqs are installed (like the Hyper-V SKU where clustering is included).

Configuring Forefront TMG for Microsoft System Center Data Protection Manager (DPM) 2010

Microsoft System Center Data Protection Manager (DPM) 2010 is a management product that provides data protection for Windows systems. More advanced than Windows Backup, DPM uses Protection Agents that provide advanced capabilities. Getting the DPM server to communicate with the Protection Agent installed on a TMG firewall can be challenging, however. DPM server-to-agent communication takes place over several non-standard ports, but it also relies on DCOM. Unfortunately the TMG RPC filter does not fully support DCOM , so we’ll need to employ a workaround to ensure that DPM communication works correctly.

[Note: Many resources that I found on the Internet detailing how to configure TMG for DPM were incorrect and didn’t work. Those that did work didn’t explain why, involved unnecessary steps, or included very broad rule sets that allowed more access to the TMG firewall than absolutely necessary. In this post I’ll provide a definitive and comprehensive guide to preparing the TMG firewall to work with DPM and its Protection Agent, while at the same time adhering to the principle of least privilege and maintaining the lowest possible attack surface.]

As stated, DPM uses Protection Agents installed on each system it manages and protects. This agent can be deployed remotely from the DPM console or installed manually and later ‘attached’. When installing the Protection Agent on a TMG firewall it is recommended that the agent be installed manually following the instructions here. Since there is no system policy access rule for DPM, we’ll need to configure access rules to allow the required communication to and from the Protection Agent on the TMG firewall and the DPM server. Begin by creating three new protocols as follows:

DPM Agent Coordinator – TCP 5718 outbound
DPM Protection Agent – TCP 5719 outbound
DPM Dynamic Ports – TCP 50000-50050 outbound

Create a Computer or a Computer Set network object that includes the IP address of your DPM server. DO NOT add the DPM server to the Enterprise Remote Management Computers or Remote Management Computers network objects.

Next, create an access rule called DPM [Inbound]. The action will be allow and the protocols will include the three new protocols you just created, along with Microsoft CIFS (TCP) andRPC (all interfaces). The source will be the DPM server and the destination will be Local Host for all users. Now right-click on the access rule and choose Configure RPC protocol.


Uncheck the box next to Enforce strict RPC compliance and choose Ok.


Create another access rule called DPM [Outbound]. The action will be allow and the protocols will include only DPM Agent Coordinator [5718] and DPM Dynamic Ports [50000-50050]. The source will be Local Host and the destination will be the DPM server for all users. Once complete the rule set should look like this:


Next, right-click the Firewall Policy node in the TMG management console navigation tree and select All Tasks | System Policy | Edit System Policy. Under the Authentication Services configuration group highlight Active Directory. Select the General tab and uncheck the box next to Enforce strict RPC compliance.


The last step required to allow the DPM server to communicate with a Protection Agent installed on the TMG firewall involves making registry changes to restrict RPC communication to a specific range of ports. This is necessary because, as I mentioned earlier, the TMG RPC filter does not fully support DCOM and is unable to manage the dynamic port assignments required for this communication. This change must be made to both the TMG firewall and the DPM server. To make this change, open the registry editor on each system and navigate to the HKLM\Software\Microsoft\Rpc key.

Create the following new keys:

Ports – REG_MULTI_SZ, 50000-50050
PortsInternetAvailable – REG_SZ, Y
UseInternetPorts – REG_SZ, Y

Note: You can download a .reg file and the TMG access policies here.

Once the registry changes have been made, the system will have to be restarted for the changes to take effect. After both systems are back online, install the Protection Agent manually on the TMG firewall and then attach the agent in the DPM management console. You can now manage TMG firewall protection in DPM just as you would any other Windows system.

Forefront TMG 2010: How to install and configure Forefront TMG 2010 —-Step by step

Forefront TMG 2010 has been built on top of the core capabilities delivered in Microsoft Internet Security and Acceleration (ISA) Server 2004/2006 in order to deliver a comprehensive, enhanced and integrated network security gateway. Forefront TMG provide additional protection capabilities to help secure the corporate network from external/Internet-based threats. Forefront TMG 2010 prevent abuse of networks from internal and external entity. Forefront provide more management capabilities in terms security and protection. Forefront TMG 2010 is available in Standard Edition and Enterprise Edition. Standard version does not support Array/NLB/CARP support and Enterprise Management. For E-mail Protection both version requires Exchange license. 

Forefront TMG 2010 provide the following enhanced protection capabilities:

  • Malware inspection
  • URL filtering
  • HTTP filtering
  • HTTPS inspection
  • E-mail protection
  • Network Inspection Systems (NIS)
  • Intrusion detection and prevention
  • Secure routing and VPN
    Understanding Network Topology

    The following Forefront TMG network topologies are available:

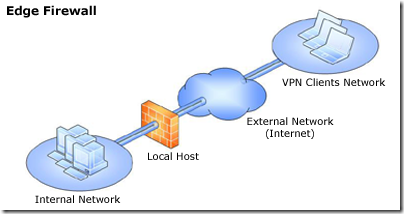
    • Edge firewall—In this topology, Forefront TMG is located at the network edge, where it serves as the organization’s edge firewall, and is connected to two networks: the internal network and the external network (usually the Internet).

    layout-large-edge

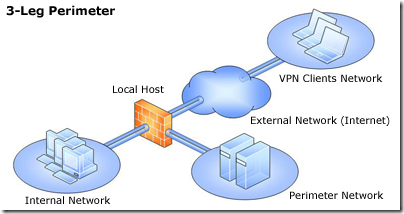
    • 3-Leg perimeter—This topology implements a perimeter (DMZ) network. Forefront TMG is connected to at least three physical networks: the internal network, one or more perimeter networks and the external network.

    layout-large-3leg

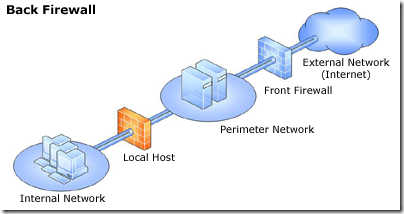
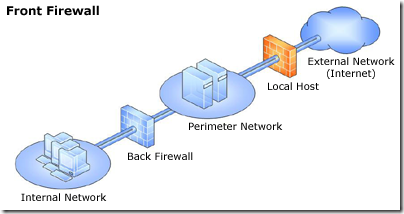
    • Back firewall—In this topology, Forefront TMG is located at the network’s back-end. Use this topology when another network element, such as a perimeter network or an edge security device, is located between Forefront TMG and the external network. Forefront TMG is connected to the internal network and to the network element in front of it.

    layout-large-backlayout-large-front

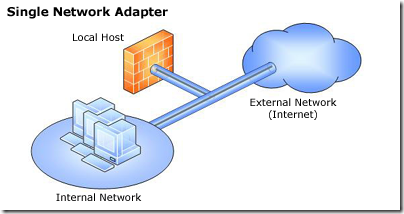
    • Single network adapter—This topology enables limited Forefront TMG functionality. In this topology, Forefront TMG is connected to one network only, either the internal network or a perimeter network. Typically, you would use this configuration when Forefront TMG is located in the internal corporate network or in a perimeter network, and another firewall is located at the edge, protecting corporate resources from the Internet.

    layout-large-snm

    Functionality of a single network adapter topology

    The single network adapter topology enables limited Forefront TMG functionality, that includes:

    • Forward (CERN) proxy for HTTP, HTTPS, and CERN proxy FTP (download only).
    • Web caching for HTTP and CERN proxy FTP.
    • Web publishing. HTTP-based communications, such as Microsoft Office SharePoint Server, Exchange Outlook Web Access 2007, ActiveSync®, and remote procedure call (RPC) over HTTP (Outlook Anywhere, Terminal Services Gateway or WSMAN-based traffic).
    • Dial-in client virtual private network (VPN) access.

    Limitations of a single network adapter topology

    The following limitations apply when you use the single network adapter topology:

    • Server publishing and site-to-site VPN are not supported.
    • SecureNAT and Forefront TMG Client traffic are not supported.
    • Access rules must be configured with source addresses that use only internal IP addresses.
    • Firewall policies must not refer to the external network.
    Hardware Requirements

    Systems requirements depends on number of users and deployment scenario. Forefront TMG is a vital part in a ICT infrastructure. To achieve best performance, you must add best processing power and memory in TMG server however the following will give you an optimum performance.

    Processor- Intel Xeon (Dual core/Quad-core/i7) or AMD Opteron (dual core/quad core). Intel Hyper-Threading Technology enabled in bios if Intel server board.

    RAM-8GB

    Disk Space –50GB systems partitions and 150GB logging +60GB-100GB Web caching in a separate partition. RAID 5 config would be highly recommended.

    NIC- 2 Gigabit NIC with redundant config (number of NICs depends on deployment scenario)

    Important! Forefront TMG has been built on 64 architecture.

    Operating Systems and features

    Windows Server 2008 SP2 64 bit or Windows Server 2008 R2

    Microsoft .NET Framework 3.5 SP1

    Windows Web Services API

    Network Policy Server.

    Routing and Remote Access Services.

    Active Directory Lightweight Directory Services Tools.

    Network Load Balancing Tools.

    Windows Power Shell

    Windows Installer 4.5

    Important! It’s not recommended to install any application or programme in TMG server other then antivirus program. It must be a dedicated server for Forefront TMG. Disable unnecessary services after installing operating systems. InstallMachine Certificate from Enterprise Root CA Authority before installing TMG. TMG server must be a member of Active Directory Domain.

    Installation of Forefront TMG

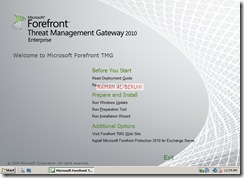
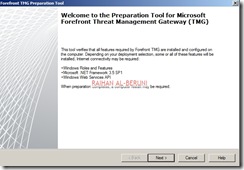
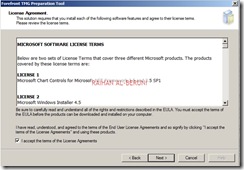
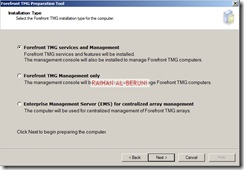
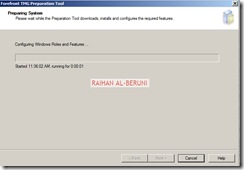
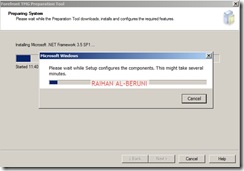
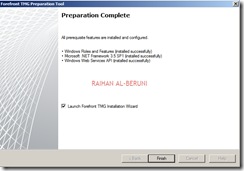
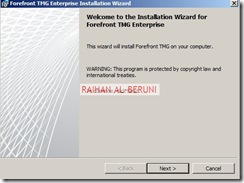
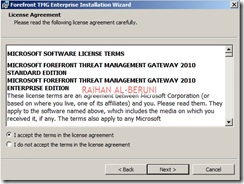
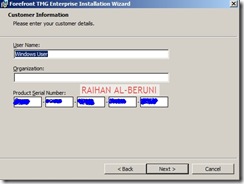
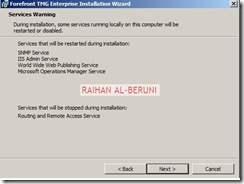
    Prepare a 64 bit Windows Server 2008. Insert Forefront TMG DVD into the server. Run preparation tools.

    1

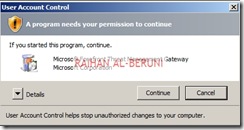
    Click continue on UAC authorization prompt.
    2 3 4 5 6 7 8

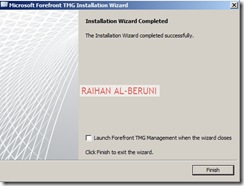
    Check Launch TMG installation. Click finish.

    9 10 11 12 13 14 15

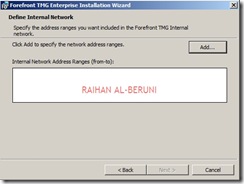
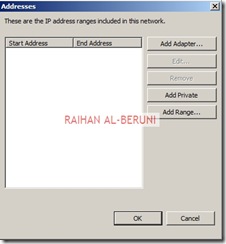
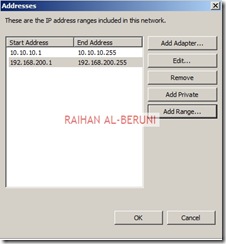
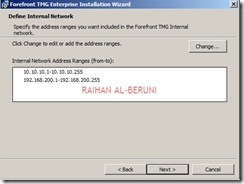
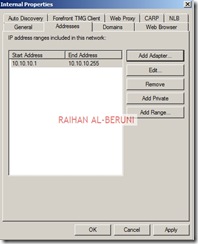
    Add ranges of internal IP address For example: 10.10.10.1 to 10.10.10.255. You can as many subnet ranges as you have for internal networks.

    16 17 18 19 20 21 22 23 24

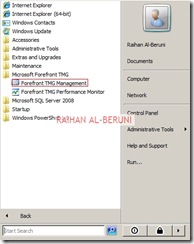
    Open Forefront TMG Management from start menu. TMG will automatically prompt you for initial configuration.

    25

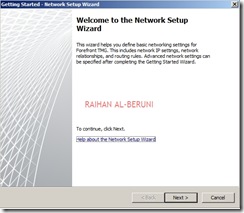
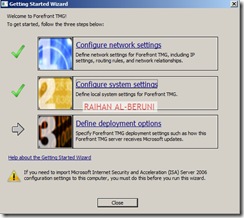
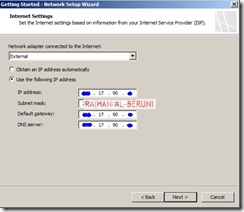
    Step1: Network Setup Wizard—Use to configure network adapters on the server. Network adapters are associated with a unique Forefront TMG network. Note that you must have static IP address in all NIC of TMG server before you proceed for network settings.

    26 27

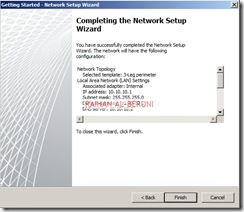
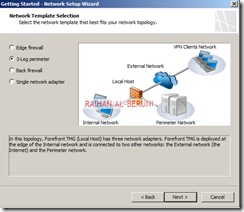
    This is highly important part of config because in this section you will mention what type of network topology you are going to use. Here, I am configuring De-militarized Zone (DMZ) or 3-Leg Perimeter. You have to select your desired config.

    28 29 30 31

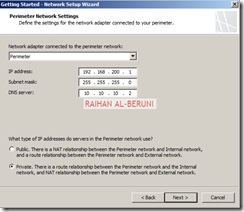
    In this section, you have to select the behaviour of the traffic among internal, perimeter (DMZ) and external network. For example, My Forefront TMG 2010 server has been configured to route between internal and perimeter and NAT in between perimeter and external as I choose private networks in perimeter. So that I can hide IP addresses of my perimeter networks.

    32 33

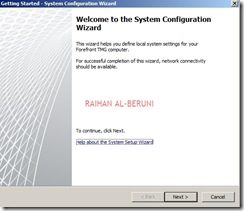
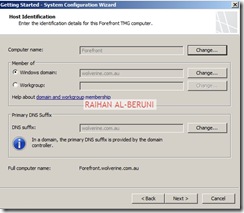
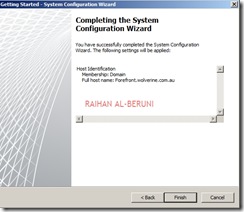
    Step2: System Configuration Wizard—Use to configure operating system settings, such as computer name information and domain or workgroup settings

    38

    35 36 37

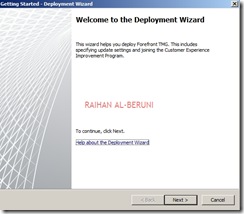
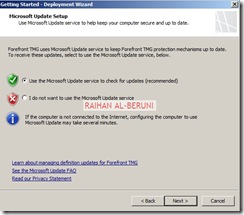
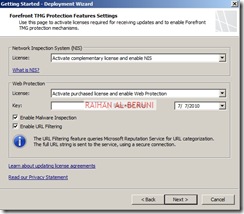
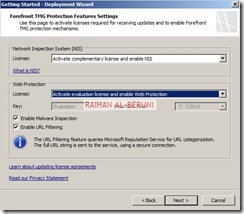
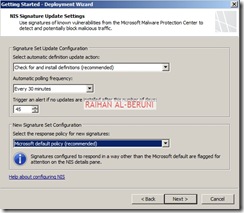
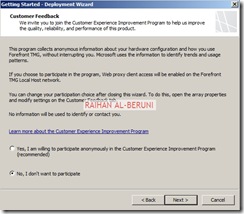
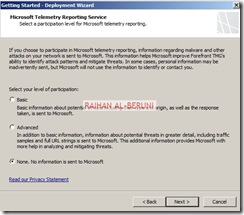
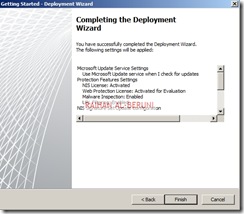
    Step3: Deployment Wizard—Use to configure malware protection for Web traffic, and to join the customer feedback program and telemetry service.

    38 39 40 41 42 43 44 45

    46

    Networks, Proxy and Update Configuration

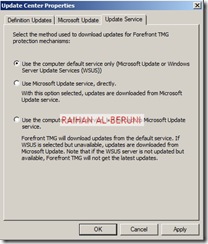
    Open Forefront TMG Management.  On the left hand pan, Select Update Centre. Click configure settings on task pan. Set update policy. If you have Windows Server Update Services (WSUS) then you may select WSUS or use Microsoft update services.
    1

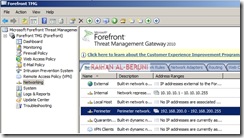
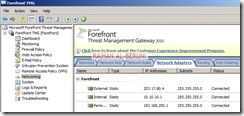
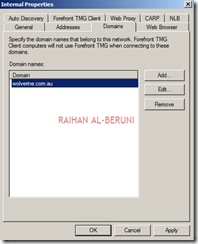
    Select networking>Select Networks Tab>Double click on Internal.  You will be presented with Internal Properties. Configure all the tabs as shown below.

    2 3

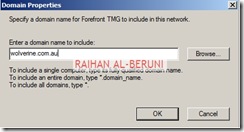
    In the domain tab, add internal domain(s). For example: *.wolverine.com.au

    4

    04

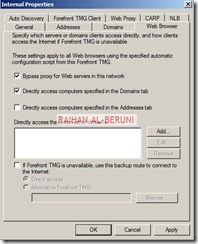
    In the web browser tab, check Bypass Proxy… and Directly Access….

    5

    Verify all your internal IP addresses you added during installation. In this window you can add more internal IP addresses if you want.

    6

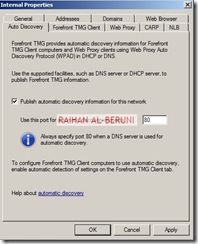
    Check Publish Automatic Discovery information for the network and use port 80 as default.

    7

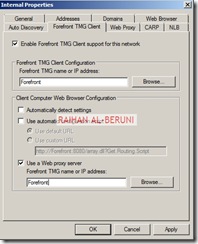
    In Forefront TMG Client settings, Check Enable Forefront TMG client support for this network. un-check Automatically detect settings and Use automatic scripts.., Check Use a Web proxy server

    8

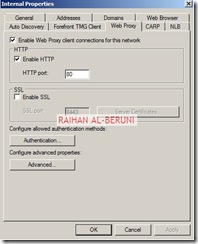
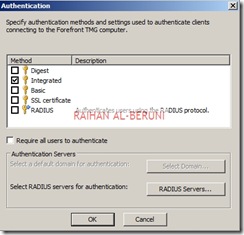
    In the Web Proxy Tab, Enable HTTP and use port 80 as default. However, you can use port 8080 if you want. Click on authentication and check integrated. Click on advanced and check unlimited. Now Apply and ok.

    9 10

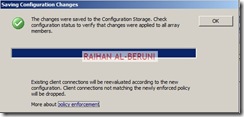
    Apply changes.

    11 12

    Now repeat all these config for perimeter networks as you did for internal networks.

    Connecting Active Directory, DNS and DHCP

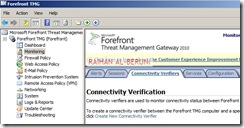
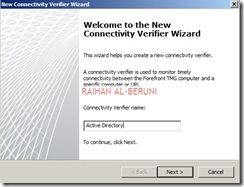
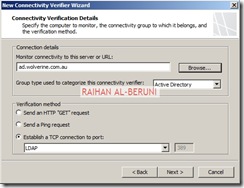
    Setup connectivity with Microsoft Active Directory, DNS and DHCP. Click on monitoring>click connectivity verifiers>Click Create New Connectivity Verifier. Create connectivity for Active Directory, DNS and DHCP.

    13 14 15

    Click Next and Finish. Repeat it for DNS and DHCP. If you have a upstream Proxy, connect to upstream proxy using similar method.

    Create HTTP and HTTPS rule

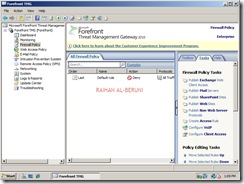
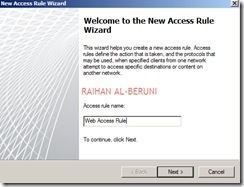
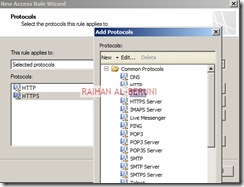
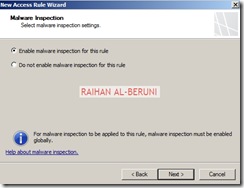
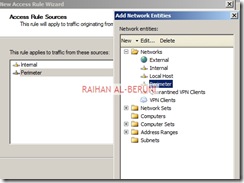
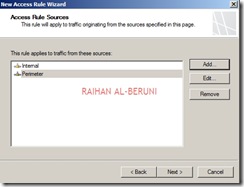
    By default all access rules are denied. Now Create web access rules for internal networks allowing HTTP and HTTPs traffic pass through from internal network to external and perimeter. Also allow HTTP and HTTPs traffic pass through from perimeter to external and internal. Click Firewall Policy>Click Create Access Rule on Task Pan.

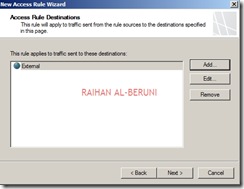
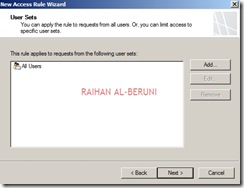
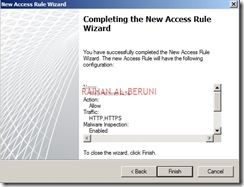
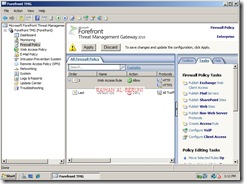
    17 18 19 20 21 22 23 24 25 26 27 28

    Test Forefront TMG Setup

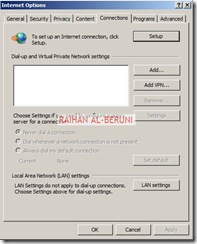
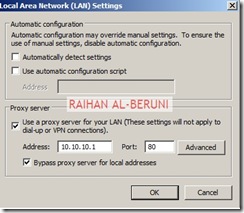
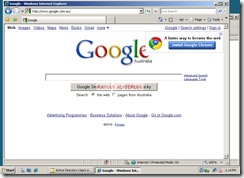
    Now moment of truth. Log on to a computer using domain user credential in any internal network. Setup proxy in IE connections and browse internet.

    29 30

    31

    Beer mugThumps UP.

    Remote Management Console Installation

    Forefront TMG is 64 bit but downloadable 32 bit TMG Admin Console available on this Microsoft link

  • Insert the Forefront TMG DVD into the DVD drive, or run autorun.hta from the shared network drive.

  • On the main setup page, click Run Installation Wizard.

  • On the Installation Type page, select Forefront TMG Management only.

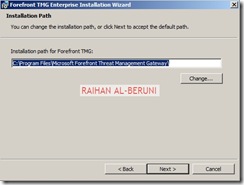
  • On the Installation Path page, you can change the default installation path.

  • On the Ready to Install the Program page, click Install.

  • After the installation is complete, if you want to open Forefront TMG Management select Launch Forefront TMG Management when the wizard closes.